Editing the Hosts file to block a website on multiple devices is a time-consuming, inflexible, and labor-intensive process.
For just $6 per license per month, you can take advantage of BrowseControl to block billions of websites across over 100 URL categories. More than 10,000 new domains are added each day, making it simple to restrict internet access even as new sites emerge.
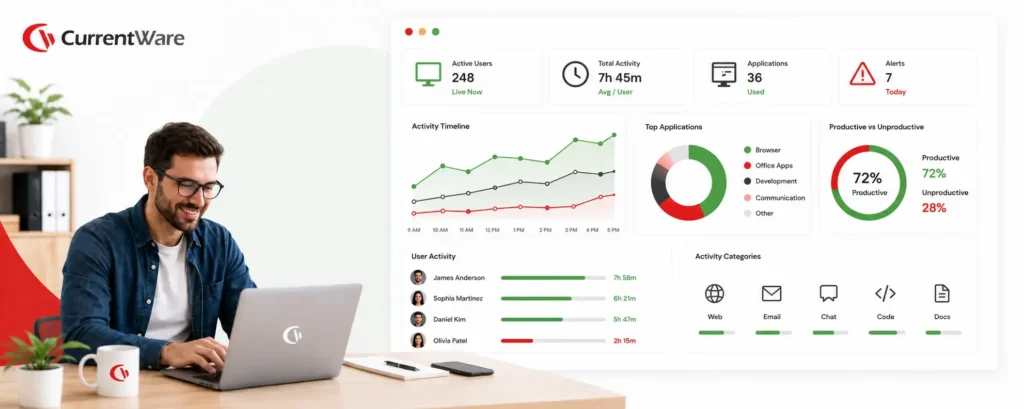
With BrowseControl you can…
- Block or allow a website based on URL, category, domain, or IP address
- Schedule unique website restrictions throughout the day
- Assign custom policies for each group of computers or users
- Enforce internet usage policies, even when devices leave the network
”As a ‘novice’ I was able to set up with help from support in about an hour. Previous software took forever and didn’t work as advertised; this software worked right out of the box. It allows my workers to use the internet and make money for the practice without distraction/temptation to use personal websites/email/shopping.”
– Gerard B., Office Manager
In this article you will learn how to use the hosts file to block websites on computers running the Windows operating system. I will also go over the limitations of using the hosts file to restrict access to the web when compared to dedicated web filtering software so you can choose the best internet management method for your needs.
Using Web Filters vs Hosts File to Block a Website
(Demo video: BrowseControl multi-category web filtering shown across different device platforms.)

Hosts File vs Web Filter
| Hosts File | Web Filter (BrowseControl) | |
|---|---|---|
| Multiple Devices | Not recommended. It forces you to decentralize the management of your network. | Recommended. The centralized console of a web filter makes managing multiple devices simple and efficient. |
| Granularity | Limited. Web access permissions can only be done on a per-device basis. Changes to the file also affects all users on the device. | Advanced. Unique web access permissions can be adjusted for each device, user, or workgroup. |
| Whitelisting | Difficult. Using the hosts file to block all websites except approved ones requires you to manually find the IP addresses of the websites you would like to allow, add them to the file, and direct all other traffic to a null route. | Simple. To whitelist websites with a web filter you simply need to add the domains you’d like to allow to a whitelist (allow list) and all other domains will be blocked by default. |
| Wildcard Filtering | Not Supported. You need to specify each and every variation of a URL you would like to block. | Supported. A web filter allows you to block all URLs within a domain with one wildcard entry. |
| Ease of Use | Difficult. You have to edit the hosts file manually for every single device you want to manage. You will also need to reconfigure the file every time you wipe the machine. | Simple. All you need to do is add the websites you’d like to block to your block list. |
Why Should I Block My Users From Accessing Certain Websites?

- Bandwidth Management: Bandwidth abuse causes severe latency and network crashes. Organizations will use a bandwidth analyzer to identify the users and websites responsible for the excessive bandwidth usage, later adding them to their internet blacklist to prevent future abuse.
- Network & Computer Security: By preventing users from accessing malicious websites that are known to contain malware, an internet filter provides critical security controls for protecting sensitive data
- Productivity Management: Content filters are used to block access to distracting websites and computer applications such as social media sites, computer games, and video streaming services.
- Data Security Compliance: Organizations that are responsible for sensitive data such as personal health information (PHI) will use internet blocking tools to prevent employees from maliciously or negligently leaking data through unauthorized data management channels such as personal cloud storage accounts.
- Blocking Inappropriate Content: Administrators will use internet filters to block content that is considered NSFW or otherwise inappropriate for their users such as porn, grotesque imagery, violence, and profanity. Filters prevent underaged users from accessing adult content while also mitigating against the use of websites that may contribute to a hostile work environment.
Want to learn more? Check out our article on the benefits of web filters.
What is the Hosts File in Windows?

The hosts file in Windows is a text file that is used by the operating system to map hostnames to IP addresses. In Windows 10 and Windows 11 it located in the System 32 folder at C:\Windows\System32\drivers\etc folder
Editing the hosts file in Windows lets you change the IP address that a given website resolves to on your computer. This allows you to override the destination that a website’s DNS zone file would normally take you to.
Since these changes only apply to your local machine this method of web filtering is useful for blocking websites on a personal device. However, anyone managing multiple devices should use a dedicated web content filter instead of blocking websites using hosts file to make policy updates more efficiently.
How It Works
How you normally get access to web content
Normally when you enter a URL (such as Facebook.com) into the address bar of your web browser it will send a Domain Name System (DNS) request to a server. DNS changes the names of these human-readable domains into an IP address such as 31.13.80.36 (for IPv4) or 2a03:2880:f10e:83:face:b00c:0:25de (for IPv6) that identifies the server’s location.
How hosts changes this
You can think of DNS as the internet phone book and the hosts file of your local machine as your own personal address book.
Imagine you’re looking up someone’s phone number. Before resorting to the phone book (DNS) you’ll first take a look at your personal address book (the hosts file) to see if you have any contact details (IP addresses). If you do, you’ll not bother to check the phone book at all.
Your computer works the same way. Before any request for a domain takes place from your web browser, your machine will actually reference the local hosts file first. If any entries are found there they will be used instead.
This is precisely how you are able to block websites using hosts file. It has lines of text that consist of an IP address followed by a host name. These lines of text can be modified to tell your web browser that a given host name should route to a given IP address.
So, if you want to stop your users from accessing Facebook you can enter Facebook.com into your hosts file and route it to the IP address of your local machine (127.0.0.1). This will allow you to block websites using hosts file.
What is the Hosts File Used For?
Block websites using hosts file
DNS changes names of domains into IP addresses. For example, 69.63.184.142 is one of the IPs of facebook.com. You can use a hosts file to change that and redirect the site you want to block to another address. It will allow you to link a certain domain name with any IP address you want.
Note: When you block websites using hosts file the websites will only be blocked on the local PC. To ensure that websites are blocked on multiple computers you need dedicated web filtering software.
The hosts file is used to block ads
Ad filtering with the hosts file works exactly the same way as blocking a website does. Entries for known malicious or spammy domains can be blocked by adding them to the file and redirecting them to another IP address.
Test and develop websites
Web developers can use the hosts file to test and develop websites on their local machine before deploying it to a platform such as WordPress, which has been used in the creation of over 861 million websites. To make changes to a website before it is made public the web developer will install the site files locally and edit the hosts file on their computer so that it points the sites domain name to the IP address of the environment they want to test in.

CASE STUDY
Keeping Students Safe With CurrentWare’s Web Filter for Schools
Unrestricted internet access is detrimental to cybersecurity and productivity. Read our web filtering in education case study to learn how CurrentWare’s website blocking software helps keep students and systems safe.
How to Block Websites Using Hosts File in Windows (Guide)
- Open Notepad as an Administrator
While logged into an administrator’s account press the Windows Key and type in “Notepad”
- Right click on Notepad and press Run as administrator

- If your User Account Control dialogue box opens up asking “Do you want to allow this app to make changes to your device?”, select Yes

- Open the Hosts File
In Notepad click on File > Open or press CTRL + O - Next, navigate to C:\Windows\System32\drivers\etc folder. Here’s how to get there: In the Address Bar of the Open Dialogue Box enter this text string: %SystemRoot%\System32\drivers\etc\hosts (Note: This is the case for Windows 10 and Windows 11. For the exact location in a different OS, check out this article)

- At first you will not see anything in this folder. To make the contents of this folder visible you must click the drop-down menu in the bottom-right corner and change it from “Text Documents (*.txt)” to “All Files (*.*)”

- Double-click on the hosts file to open it
- The default, unmodified file should look exactly like this
- (Optional) Backup the hosts file
As a precaution you can make a backup of your hosts file by copying the text to a new Notepad file. Should the changes you make to your host file cause unwanted behavior you can simply replace the edited hosts file with the backup. You can also visit this guide to reset the hosts file back to its default configuration. - Add the Websites You Want to Block to the Hosts File
In this example we will block the computer from accessing Facebook.Press Enter to create a new line, then add this to your hosts file: 127.0.0.1 www.facebook.com.It’s important to note that this will only block www.facebook.com specifically. You will need to add a new line for Facebook.com to completely block Facebook.The IP address 127.0.0.1 is the default IP address for the local machine (localhost). Using this as the remapped IP will ensure that you do not accidentally send your users to an unwanted IP address. You could also use a non-existent IP address such as 0.0.0.0 if you wish.Note: When you attempt to visit a blocked domain after it has been added to your hosts file you may get a privacy/security warning from your web browser. This is because the web browser was expecting a valid security certificate from the domain. Since the hosts file remaps the connection attempt back to the localhost rather than the actual website the web browser will flag the unexpected behavior.

Start Blocking Websites With BrowseControl Web Filter (Free Trial)
BrowseControl blocks apps, internet distractions, and high-risk sites no matter where your Windows devices are. Effortlessly manage your entire workforce from a convenient central console.
- Improve Productivity & Security
Block distracting and high-risk websites to protect your organization - Enforce Internet Use Policies
Prevent access to web content categories that go against policies - Web Content Category Filtering
Block millions of sites in just a few clicks with hundreds of content categories
Troubleshooting & FAQ
My Hosts File is Read Only. How Do I Fix This?
When a file is read-only you can freely open it but you can’t save any changes you make.
Follow these steps to disable read-only mode:
- Go to the hosts file: Enter %SystemRoot%\System32\drivers\etc\ in the address bar of the file explorer or enter that string as a Run command
- Right-click on it and click on Properties

- At the bottom of this screen you will see Attributes. If the Read-only checkbox next to it is filled in you can click it to disable the Read-only attribute

- Click on Apply and OK to save your changes
- After making your desired changes to the hosts file you should consider reenabling read-only again to help prevent unwanted changes.
What Are the Default Contents of the Hosts File?
# Copyright (c) 1993-2009 Microsoft Corp.
#
# This is a sample HOSTS file used by Microsoft TCP/IP for Windows.
#
# This file contains the mappings of IP addresses to host names. Each
# entry should be kept on an individual line. The IP address should
# be placed in the first column followed by the corresponding host name.
# The IP address and the host name should be separated by at least one
# space.
#
# Additionally, comments (such as these) may be inserted on individual
# lines or following the machine name denoted by a ‘#’ symbol.
#
# For example:
#
# 102.54.94.97 rhino.acme.com # source server
# 38.25.63.10 x.acme.com # x client host
# localhost name resolution is handled within DNS itself.
# 127.0.0.1 localhost
# ::1 localhost
Note: All of the octothorpes (aka hashtag/pound sign/number symbol – #) are used to comment out text entries. Any content on the same line as the # symbol will be ignored. Thus, the default file does not actually do anything.
How Do I Open the Hosts File in Windows?
Method 1: Access Using the File Explorer
To access the hosts file using the file explorer you simply need to log in to an administrator account and enter %SystemRoot%\System32\drivers\etc\ into the address bar. If it is not there, it may be hidden. Follow this guide to show hidden files in Windows.

Method 2: Access With a Run Command
- Open the Run App
Press the Windows Key + R to open the Run app - In the Open: text field, type in this string of text: %SystemRoot%\System32\drivers\etc\hosts

- Hit Ctrl+Shift+Enter to run your command with admin privileges. Do not simply hit the Enter key by itself as this only runs the command with normal user privileges.
- You may be prompted by Windows to choose a program for opening the file. You can choose a basic text editor such as Notepad.

- You should now see the file. It will look like this.
If you do not have administrator permission, you will receive an error like this:

Note: You must have administrator privileges to access and edit the hosts file. If you do not run Notepad under administrator privileges, you will only get to view the file and you will be unable to save your changes to the appropriate folder. Any changes you make will not work unless it is saved in the correct location – saving it in the Documents folder will not allow you to block websites using the hosts file.
Method 3: Open With Notepad
- Open Notepad as an Administrator
- In Notepad click on File > Open or press CTRL + O
- In the Address Bar of the Open Dialogue Box enter this text string: %SystemRoot%\System32\drivers\etc\hosts
- At first you will not see anything in this folder. To make the contents of this folder visible you must click the drop-down menu in the bottom-right corner and change it from “Text Documents (*.txt)” to “All Files (*.*)”
- Double-click on the file to open it
How to Block Websites in Windows With Web Filtering Software
Need to restrict employee internet access at-scale? With BrowseControl you can block websites for all of your computers and users in just a few clicks. BrowseControl’s granular internet restriction policies allow you to apply unique restrictions to each group of users or computers in your company.
Frequently asked
Frequently Asked Questions
-
The hosts file is a simple text file on your computer that acts as a local address book for websites. Before your PC asks the internet for a website’s location (IP address), it checks this file first. By adding entries to the hosts file, you can manually instruct your computer to direct traffic to a specific domain, allowing you to redirect or block websites directly on your machine.
-
You can find the hosts file in the C:\Windows\System32\drivers\etc folder. To edit it, you must open a text editor like Notepad with administrator privileges. Simply search for Notepad in the Start Menu, right-click it, and select “Run as administrator.” Then, navigate to the folder and open the file. Remember to show “All files” to see it.
-
If you can’t save your changes, it’s almost always because you didn’t open your text editor with administrator rights. The hosts file is a protected system file, and Windows prevents normal users from modifying it to protect the security of your system. Close the file, re-open Notepad as an administrator, and then make your edits again.
-
To block a website, open the hosts file as an administrator and go to the very bottom. On a new line, type 127.0.0.1, press the spacebar once, and then type the website you want to block (e.g., 127.0.0.1 www.distractingwebsite.com). Add another entry without the “www.” on a new line (e.g., 127.0.0.1 distractingwebsite.com) to be thorough. Save the file to apply the block.
-
This often happens because modern browsers use a feature called DNS-over-HTTPS (DoH), which can bypass the hosts file entirely. To fix this, you’ll need to disable DoH in your browser’s security settings. Also, make sure you clear your computer’s DNS cache by opening Command Prompt and running the command ipconfig /flushdns so the changes take effect immediately.
-
No. The hosts file method only works on the specific computer where you made the changes. It will not block websites on your smartphone, tablet, or other computers on your Wi-Fi network. Each device has its own local settings, so for network-wide control, you would need to configure your router or use a different blocking method.
-
While effective for a few sites, the hosts file is not ideal for blocking long lists. It quickly becomes difficult to manage, update, and organize. There is no way to block entire categories of websites (like gambling or social media) or apply different rules for different users on the same computer. It’s a manual process that doesn’t scale well.
-
For more powerful and flexible control, dedicated web filtering software like BrowseControl is a far better solution. Unlike the hosts file, it can’t be easily bypassed, can block entire categories of content with one click, and lets you create unique blocking schedules for different users. This provides centralized, scalable, and much more reliable content filtering for any professional or family environment.
Conclusion
There are multiple ways to block users from accessing certain websites. Editing the hosts file in Windows is a viable method for blocking websites on a per-device basis, however to properly manage web filtering policies across multiple devices on a network you will need a centralized web filter.