CurrentWare v8.0.1 is here! Read the release blog to learn more.

Don’t Plug In That USB! – How Rogue USB Devices Harm Endpoint Security

USB flash drive next to laptop

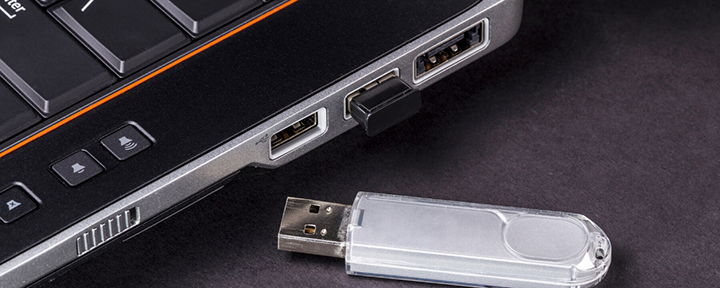
Universal Serial Buses (USBs) are incredibly common connectors used in electronic devices such as flash drives, keyboards, external hard drives, desktop fans, and plenty of other devices. 

The ability of USBs to transmit both data and electricity makes them incredibly useful for connecting devices to computers – it also makes them an endpoint security nightmare. 

Organizations can suffer detrimental data breaches after their systems become infected with malware following one of their users plugging a rogue USB device into an endpoint device such as their workstation. By better understanding the potential threat that rogue USB devices can have on endpoint devices and data security, organizations can better defend against this threat.

Why Are USB Devices Dangerous?

USB devices can be used to transmit malware or even cause physical damage to hardware. Devices such as the USB Killer, a niche USB device designed to look like a flash drive, rapidly damage sensitive electrical components with rapid charge/discharge cycles when inserted into a USB port.

Malicious actors (aka “black hat” hackers) can use USB devices to stealthily infect computers with malware by executing a “payload” when the USB device is connected. The payload is malicious software that is designed to perform a set of malicious functions such as leaking sensitive data, installing spyware to stealthily monitor user activity, deleting/corrupting files, or execute a command to install other malware onto the now-compromised system.

Any USB Device Can Be Dangerous

Any unknown USB device should be treated as a vector for an attack from malicious attackers. 

While the typical culprits are USB flash drives and external hard drives, niche product developments such as the O.MG cable and USBHarpoon have shown that even seemingly innocent devices such as USB cables can be specially-designed with the hardware required to execute a payload when it is connected to a computer. 

Any USB device – including USB-powered fans or lights –  can be modified to include data transmission and storage capabilities, leaving unsuspecting users to be none-the-wiser that they have become a negligent insider threat thanks to their trust in an unknown USB device.

removable media policy template mockup

Removable Media
Policy Template

  • Set data security standards for portable storage
  • Define the acceptable use of removable media
  • Inform your users about their security responsibilities

Get started today—Download the FREE template and customize it to fit the needs of your organization.

How Do Attackers Get Access to the Computers?

You may have noticed a critical component of USB attacks – they require that the USB devices are given direct access to the USB ports in order to execute the payload. 

While the USB devices do need to be directly connected to a USB port to initiate the attack, the attacker themselves do not need to be the ones plugging in the USB. The attacker can pre-load a USB device with a payload that can execute automatically once the USB device is plugged in by a third party.

Social Engineering

Social engineering – the use of flaws in human psychology to manipulate individuals into inadvertently cooperating with the attacker – is scarily effective in transmitting payloads through unknown USB devices. 

Attackers can use social engineering to exploit the curiosity of employees with poor cybersecurity practices by leaving infected USB flash drives in spaces used by the organizations they intend to target. In an experiment conducted by the University of Illinois and the University of Michigan, USB flash drives were scattered across a large university campus resulting in a staggering 45-98% of the USBs being inserted into machines. 

The majority of those duped by the social engineering study did so in an honest attempt to discover the owner of the flash drive, though some acted out curiosity or out of the intention to keep the flash drives for future use.

Insider Threats

An organization relies on teams of trusted people to function. Unfortunately, trusted employees, contractors, or visitors can become malicious insider threats under certain circumstances. An unknown person walking throughout the office is certain to be suspicious, but employees working for an organization that allows USB devices can easily sneak past security personnel to deploy a payload.

How to Protect Against USB Device Attacks

USB devices can be dangerous if mismanaged, but there are ways to protect endpoint devices against the threat of malicious USB attacks.

An organization’s data loss prevention (DLP) strategy can be greatly improved by strengthening its defenses against USB attacks with the appropriate combination of physical security, DLP software with USB access control features, and regular cybersecurity training for users.

Physical Security

While the chances that an unknown individual will directly enter an organization to deliver their malware payload, physical security measures are still a significant factor for endpoint security. Physical security such as locked doors, security personnel, and video surveillance all contribute to preventing attackers from directly accessing the organization’s hardware.

Cybersecurity Training

An organization that takes its data loss prevention seriously must invest in providing its users with frequent cybersecurity training that addresses their cybersecurity responsibilities as well as the forms of attacks that can be executed against the organization.

When users are properly trained they will better understand how to use the organization’s computers and network in a safe and responsible manner, reducing the chances that they will fall victim to social engineering attacks that rely on phishing and unknown USB devices to be executed.
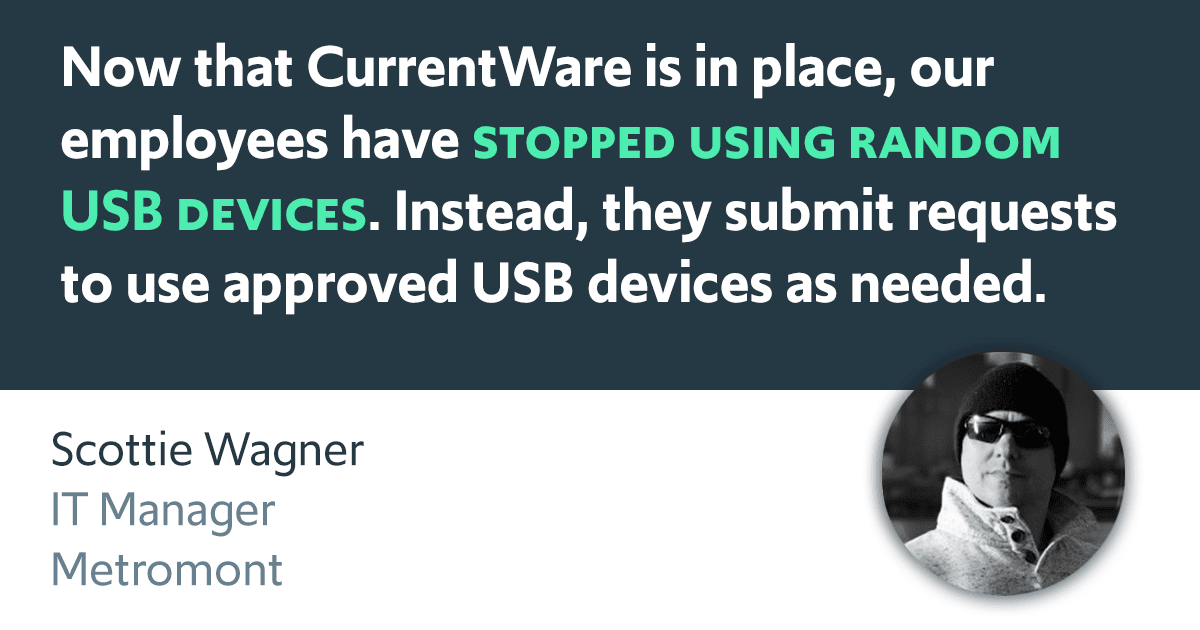
Use USB Access Control Software to Block USB Ports

Organizations that want to improve their data loss prevention capabilities by protecting their network and endpoints against unknown USBs should proactively invest in endpoint security software with integrated USB access control features. 

The USB access control features provided in endpoint security software allow organizations to have greater control over the USB devices that are permitted to be used within their network, reducing the opportunity for unknown USB devices to execute their payloads. 

When investing in endpoint security software, here are key features to look out for:

  • Device Permissions: Whitelists (allowed list) and blacklists (restricted list) to granularly configure USB device permissions.
  • Device Access Alerts: Alert administrators when endpoint devices are being accessed by the end-users.
  • File Operations Detection: Monitor endpoints to detect when files are copied to USB flash drives and external hard drives.
  • Block File Transfers: Prevent data leaks by blocking unauthorized file transfers from computers to external devices.
  • Solution Flexibility: The ideal endpoint security software must have flexible customization options to allow administrators to configure the software solution to best fit the needs of the organization.

Block USB Ports with AccessPatrol USB Blocker Software

Hi this is Dale from the CurrentWare team.

Today I’m going to show you how to get started with implementing your first USB security policies with AccessPatrol. 

This video will cover the key features of AccessPatrol, including:

  • How to configure device restriction policies, such as restricting removable media to trusted devices only
  • How to apply unique device restrictions to groups of users or computers
  • How to temporarily bypass device control policies using the device scheduler and access code generator
  • How to monitor peripheral device usage for high-risk activity using scheduled reports and USB activity alerts
  • And finally, examples of the peripheral device activity data that AccessPatrol captures

This demo will be using version 7.0.1 so there may be small differences if you are using another version.

Before watching this video you should already have the CurrentWare web console set up, the CurrentWare Clients installed on the computers you would like to manage, and your users or computers placed in their own policy groups.

For more information on installing CurrentWare and setting up your policy groups, please visit the knowledge base at CurrentWare.com/Support.

To start, decide if you will be managing your organization’s USB security policies based on users or computers. 

If you select User mode your policies will apply to the users no matter which managed device they log in to; if you select PC mode your policies will apply to a specific computer. 

Whichever mode you have selected is the mode that will have its policies active; you cannot operate in PC mode and user mode simultaneously.

If you are using a terminal server to manage your clients you must use AccessPatrol in PC mode.

Alright, let’s get started!

First, I will show you how to block removable media devices using AccessPatrol’s Device Permissions feature.

  • From the Manage window, click “Device Permissions”
  • At the top of the Device Permissions window you will see a drop-down menu. From this menu you will select the group of computers or users that you want to apply the device control policy to. 
  • Then, for each peripheral you want to restrict you will press the drop-down menu and select your desired restriction level. 

As of version 7.0.1 the following restrictions are available:

For removable media devices you have three options:

  • Full Access
  • Read Only
  • And No Access

For Bluetooth devices you have:

  • Full Access
  • Allow Audio Only 
  • And No Access

For everything else you have Full Access and No Access.

  • With Full Access selected the computer or user group will be allowed to connect that device type
  • With Read Only selected the group can open files on the device when it is connected to the computer, but they will not be able to perform file transfers and they will not be able to delete or modify files.
  • With No Access selected the group cannot read or write to that specified device type; instead, depending on your Warning Message settings either nothing will happen or they will receive a warning message.

In this example I will block USB portable storage devices, CDs/DVDs, and floppy disks on the computers used by our Accounting department.

Once you’ve configured your desired device restriction policies for the selected group, press “Apply” to save your changes. Then, press the “X” button in the top-right corner of the Device Permissions window to close the window.

If you’d like to set unique device restriction policies for each group, simply repeat the same process for each of your groups.

If you’d like to use the same device restriction policies for multiple groups, copy group settings by following these steps:

  • Press on a group of users or computers to highlight them
  • Press the three dots that appear next to the group name
  • Select “copy group settings” to bring up the copy group settings window
  • At the top of this window you will see the source group; this is the group that you will be copying settings from
  • On the left-hand side of this window you will see the AccessPatrol settings that can be copied to the other groups.
  • On the right-hand side you will see the groups that you can copy settings to
  • In this case, if I want to copy the Device Permissions settings from the Accounting group to the Management group I’d set Accounting as the source group, select “Device Blocking” under the “AccessPatrol Setting” pane, select “Management” from the Destination Groups, then press “Copy”.

Be careful when selecting source and destination groups in the Copy Group Settings window; all of the destination group’s previous settings will be overwritten with the selected settings. 

Next, I will show you how to allow specific trusted devices while blocking all others using the Allowed List. 

This configuration is ideal if you want to prevent unauthorized devices from being used on your computers or if you only want to only allow certain groups to have access to a particular type of device, such as only allowing IT staff to use removable media devices.

To do this:

  • Select “Allowed List”
  • Ensure that the “Enable Allowed List” toggle is active
  • Use the drop-down menu to select the group you’d like to apply the policy to
  • Press the “Add from Available devices” button.
  • The Available Device List window will show you all of the applicable devices that have been inserted into any of your managed computers since you’ve installed the CurrentWare Client. You can identify devices based on Vendor ID, serial number, and PNP device ID.
  • On the left-hand side you will see all of the computers that have had applicable peripherals attached to them. If you’re searching for a device that was used on a specific computer you can narrow down the available device list by only checking that computer.
  • If you’re searching for a recently attached device you can sort by the last connected date to easily find the device.
  • Or you can simply use the search bar
  • In this case I want to allow two specific USB drives for all of my computers. To do this, I select the devices I want to allow from the Available Devices List, press the white drop-down arrow on the “Add to Allow List” button, then I’ll select “Add to Multiple Groups”
  • From here I’ll select all of the groups that I want to provide access to the specific devices I selected, I’ll press “Add to Allow List”, then I’ll press “Yes” to confirm.
  • If I only wanted these two devices to be accessible to a single group, all I have to do is press the “Add to Allowed List” button instead and the group I selected at the previous window will have those devices added to their Allowed List

Now that you have your core USB security policies in place, I’ll show you how to use AccessPatrol’s complementary features.

This section will cover:

  • Using the Access Code Generator to temporarily bypass device restrictions on a specific computer
  • Using the Device Scheduler to modify device permissions at a set schedule
  • And using the Block File Transfers feature to prevent specific files and files with specific keywords from being transferred to removable media devices

The Access Code Generator allows administrators to generate a time-limited single use code for a specific computer or user. These codes can be made on-demand or pre-generated for use within 30 days. The temporary access code does not require internet access to use.

The most common uses for the Access Code Generator are:

  • Temporarily allowing guests to use portable storage devices on a specific computer
  • Allowing trusted users to bypass USB security policies in a time sensitive situation when a CurrentWare Operator is not available to add new devices to the allow list
  • And allowing mobile workers to have temporary device access when they are disconnected from the CurrentWare Server and unable to receive new policy updates

If the user has a connection to the CurrentWare Server you will see when their access code is active under the “Devices Blocked” column in the manage window.

To create an access code:

  • Select an individual user or computer from the list by clicking the left-most box next to their name
  • Click “Generate Access Code”
  • Set an expiration date of up to 30 days
  • Set how many hours the access code will be active for
  • Then, click the “Generate” button to generate a unique access code
  • Press the icon next to the access code to copy it to your clipboard, then share it with the user you generated the code for

To use the access code, your user must:

  • Browse to their Control Panel
  • Ensure that “View by” is set to Large icons or small icons
  • Click “Grant Access to Endpoint Devices”
  • Then, they’ll enter their access code into the window that pops up

Once your user presses the unlock button they will be completely unrestricted by AccessPatrol for the duration that you set when creating the Access Code. During this time you may want to visit that user’s dashboard and monitor them for suspicious activity; I will show you how to do that in another video.

Next, let’s look at the Device Scheduler.

With the Device Scheduler you can modify the device permissions you have set for storage devices based on daily or weekly schedules. Any USB control policies you implement in the Device Scheduler will override the restrictions you placed in the Device Permissions window.

Here are some ways you can use the device scheduler:

  • Allow devices to be used during work hours only
  • Block storage peripherals during office hours, but enable them while the office is closed to allow automated local data backups.
  • Or, in high security environments you can narrow the window of time that portable storage devices can be used to ensure that all use is carried out under supervision

Once you’ve added your desired device schedules, return to the main window and set the toggle for “Enable Device Scheduler” to active.

Next, I’ll show you how to use the Block File Transfers feature to prevent file transfers to and from portable storage devices based on keywords in the file name as well as file extensions.

Here’s how to use the Block File Transfers feature:

  • Press the icon with the ellipses, then press Block File Transfers
  • Under “Block File Transfers for”, select the group you want to restrict
  • Enter the filenames or extensions you want to restrict; for example, adding .pdf will stop PDF files from being transferred to and from USB devices
  • You can repeat this process manually one at a time for each filename or extension you want to block or you can import a text file that contains each filename or extension listed on its own line. 

By selecting “Apply Block File Transfers on Allowed Devices” the Block File Transfers feature can even be used to restrict these data transfers to your trusted devices.

In this next section I will show you how to monitor USB device usage with AccessPatrol’s USB activity reports.

AccessPatrol collects a variety of data points related to peripheral device usage, including:

  • File Operations such as USB file transfer history
  • Usage history of allowed vs blocked devices
  • File types that are copied, created, and deleted through removable media
  • And what types of peripheral devices are being used

These data points are then used to populate a variety of reports, alerts, and dashboards that IT security teams can use to investigate potential insider threats such as employees transferring sensitive data to removable storage devices.

Having detailed logs of USB activity is essential for regulated organizations that need to ensure that their USB security policy and data loss prevention methods meet their regulatory compliance requirements.

While the best practice is to block all removable media devices and provide a more secure alternative for data transfers, this is not always practical for some organizations. In those cases, a detailed USB activity log is an essential tool for ensuring that employees and contractors are compliant with the organization’s USB security policies. 

Allright, let’s get started

  • First, click on “Device Reports”
  • Under “Report Type” you can see all of the available report types
    • File operations history
    • All Devices accessed
    • access of allowed devices
    • access of blocked devices
    • allowed vs denied access
    • And top N active machines

For this example we’ll configure a File Operations History report.

By default the report will include all file operations to removable media devices; you can also use the dropdown menus to selectively include only specific file operations.

These file operations are:

  • Copied files
  • Created files
  • Deleted files
  • Renamed files
  • And Files that are saved to removable media devices

Next, select the computers or users you’d like to include in the report. You can select individual users or computers from a group, the entire group, or your entire workforce.

You can use these sorting options to choose how you want the data to be sorted in the report.

Next, select the reporting period.

Once you have your settings configured you can save it as a report profile. Report profiles are used to automate scheduled reports that will be sent to an email inbox. 

They can also be used to configure all of your settings by selecting the report profile rather than manually adjusting the parameters each time. By default your report profiles will be automatically updated to include new users or computers as they’re added; this can be changed in the AccessPatrol settings menu.

Press the run report button to generate the report. This report can then be saved or printed by using the buttons in the top right corner.

If your reports and dashboards are filled with irrelevant information, you can selectively exclude data about specific devices and file names from these reports using the Exclusion List. The Exclusion List is a global setting that will affect the reports and dashboards for all groups.

Here’s how to use the Exclusion List:

  • Press the icon with the ellipses then press Exclusion List
  • From here you can enter the device names and file names you want to exclude from your reports and dashboards; for example, adding .pdf will stop PDF files from being shown in your reports. 
  • You can repeat this process manually one at a time for each filename or extension you want to exclude or you can import a text file that contains each filename or extension listed on its own line. The device and file name exclusions are managed separately so you will need a separate text file for each one.
  • If you need to bypass your exclusion list you can press the “Show excluded devices in report” checkbox in the device exclusion list and the “Show excluded Files Name in report” checkbox in the File Name exclusion list
  • If you still want your monitored devices to track events about these excluded devices, be certain to check “Upload excluded Devices from client” in the Device exclusion list and “Upload excluded Files Name from client” in the File Name exclusion list.  Otherwise, this data will not be captured.

Next, I’ll show you how to use the report profile we created in the previous steps to automate the generation and delivery of the reports to designated email inboxes. This Email Reports feature is a convenient way to deliver USB activity reports on a regular basis without having to log in to the web console each time. 

If you only want to receive a report when specific events occur I will cover that in the next section when I show you the Email Alerts feature.

Before you begin, you will need to configure your email settings by going to settings > Email settings. You can have the email reports and alerts sent through your organization’s email server as well as a variety of web email services such as Gmail.

How you configure email settings will depend on the email server you use. For more details please visit the CurrentWare knowledge base at CurrentWare.com/Support/

Once your email settings are configured, return to AccessPatrol’s manage section and click the Email Reports button. This main screen will show any currently configured email report schedules. 

  • Click the “New Schedule” button to create a new report schedule
  • Enter the email address of who should receive the report; you can add multiple email addresses separated by commas
  • Select the report profile you’d like to send, your desired report format, and when you want to send the report. 
  • In this case I will schedule the File Operations History report profile I created earlier to be sent every Monday at 6am. The CurrentWare Suite uses the time zone of the computer or server the CurrentWare web console is hosted on to determine the time.

Next, let’s look at creating email alerts.

Email alerts are similar to email reports except instead of sending reports at a predetermined time AccessPatrol will instead send an alert email when specific parameters are met, such as an employee attempting to insert an unauthorized USB flash drive into a managed computer.

Here at the main screen you will see your currently configured alerts.

To create a new alert:

  • Hit the New Alert button
  • Enter a name for your alert and which email addresses it will go to. 
  • Select the group of computers or users you would like to monitor
  • Select the alert type; you can receive alerts related to USB file operations as well as peripheral devices.
    • The file operations alerts can be applied to all files or only files with a specific file extension or file name. 
    • The device alerts can be set for specific peripheral devices, all devices, unknown devices, devices that are on the allowed list, or blocked devices.
  • Once you’ve configured the parameters for your email alert you can press “Apply”, then at the next screen press “Save Alert” to activate your alert profile.

That’s it for today’s video. If you have any questions you can reach out to the CurrentWare support team at CurrentWare.com/Contact/ or you can get more information from our self-serve knowledge base at CurrentWare.com/Support/

With a full-featured 14-day FREE trial of AccessPatrol, organizations have the opportunity to test an endpoint security software solution designed to protect their data and secure their endpoints.

AccessPatrol is an endpoint security software that is available as a stand-alone product or as part of the CurrentWare Suite. CurrentWare customers use AccessPatrol to strengthen their data loss prevention capabilities by blocking USB ports, disabling unauthorized external devices,  and configuring custom device permissions for their users.

If your organization is ready to enhance its data loss prevention strategy, click the button below to request a free trial of AccessPatrol and an expert from the CurrentWare team will provide you with everything you need to get started.

Download AccessPatrol Trial

Dale Strickland
Dale Strickland
Dale Strickland is the Digital Marketing Manager for CurrentWare, a global provider of user activity monitoring, web filtering, and device control software. Dale’s diverse multimedia background allows him the opportunity to produce a variety of content for CurrentWare including blogs, infographics, videos, eBooks, and social media shareables.